Welcome to episode 52. Another first this week as I release two episodes in one week. I’m going to continue taking a brief look at each episode to date, giving a brief mention of what was discussed and mention one or two of the main points of that Podcast. The thing is, I didn’t want to make this drag on for too many weeks, so I’ve pushed the boat out a bit and gone and done another one. As with the last two summaries, I won’t be covering all the tips and techniques of course, as it would take as long as just listening to all the original episodes. These summaries will give you the gist of what I’ve covered so far. There are many more pearls of advice hiding in the old episodes though, so hopefully this will give you some pointers as to what episodes you want to go back and listen to, either for the first time, or to recap on what’s been discussed in the past. Let’s pick start this week from episode 23.
In episode 23 we talked about using telephoto lenses successfully. Using a telephoto lens well does not seem that daunting, but when you start to get past a few hundred millimetres, a few things start happening that aren’t obvious until you actually try it. Firstly, I explained what constitutes a telephoto lens. I’m sure there are varying opinions on this, but in 35mm terms, generally, from 60mm to 100mm is “short telephoto”, a 200mm lens would be considered “medium-telephoto” and a 300mm long telephoto. Anything from 400mm and above is considered super-telephoto. The first thing you’re going to find is that telephoto lenses are much more susceptible to camera shake. This is because you are magnifying the subject more and more as the focal length increases, and so magnifying any movement in the camera and lens when shooting it. This is compounded by the fact that the bigger the lens gets, the heavier it is and so the harder it is to keep still if you are hand holding. The rule of thumb for using the focal length as the minimum shutter speed is worth getting used to. That is, if you are shooting at 100mm you need a minimum shutter speed of 1/100th of a second, and that needs to be increased to 1/160th of a second if you are working with a camera with a 1.6 crop factor. Another example would be say 300mm focal length, with a 1.6X crop factor would need a 1/500th of a second shutter speed, which is the next speed up from 480. The image stabilizing or Vibration Reduction systems will help, by two or three stops, and you can go back to episode 10 to learn how to calculate your new shutter speeds in stops if you aren’t sure about this. Increasing the ISO to get a faster shutter speed and also using a tripod or monopod for longer telephotos is recommended, but too fast an ISO will introduce grain, and you still have to deal with subject movement when using a tripod. The other thing to keep in mind with long telephotos is that the longer the focal length gets, the shallower the depth-of-field gets. For small birds say, the depth-of-field does not have to be that great to get a fair amount of the bird in focus, but when you consider for example that when shooting something 10 meters or 32 feet away with a 400mm lens, the depth of field is only 20cms, or 8 inches. So if your subject is a large bird with a 30cm or 12 inch wing span, you’re going to run out of DOF. If this is what you’re looking for that’s fine, but it should be bore in mind.
In episode 24 we kind of followed on from the Telephoto Lens theme, by talking about Teleconverters and Extension Tubes. Can actually calls teleconverters extenders, which have glass elements, and not to be confused with Extension tubes, which do not have any glass. They simply put more space between the lens and the camera body to increase magnification. A teleconverter is a relatively cheap way to increase the focal length of your lenses, without affecting the minimum and maximum focusing distances. Extension tubes on the other hand shorten the minimum focusing distance so that you can focus on subjects much closer to the lens, so they are great for macro work. Be careful with extension tubes though, as they not only shorten the minimum focusing distance, they greatly minimize the maximum focusing distance, to just a few inches in front of the lens in some cases. There are lots of applications for both that I explain in detail in episode 24, and there are certain combinations of extender that aren’t supported too, so please do check your lens manual for compatibility or check at the camera store before buying anything. Again, as you increase your focal length by using a teleconverter, the depth-of-field gets shallower, as it also does when using an extension tube, because you are effectively much closer to the subject.
From episode 25 to 28 we embarked on a kind of travelogue of my February trip to Hokkaido, looking at images of Japanese Red-Crowned Cranes, Steller and White-Tailed Eagles, Deer and Seals among other things. There were a fair number of tips and techniques discussed throughout these four episodes, but I’ll just touch on a few of the main ones here. When shooting wildlife, especially birds, that can be far away most of the time, you need a super-telephoto lens to fill the frame with them. But then they might take to the sky and fly right over your head too, requiring a wider angle to get them in the frame. It’s impossible to change lenses, no matter how quickly you can do it, in the few seconds that you have after spotting the approaching birds to actually needing to capture the image. To overcome this, I try to keep an old camera after upgrading to a newer model so that I can take two bodies on trips like this. I’ve actually just sold my Canon EOS 20D to put the money towards a new lens, so I’ll be stuck on my next trip unless I buy a new body by then, but during my February 2006 trip I used both the 20D and the 5D together to cover all possibilities. In image 863, you can see that I captured a comical scene of a crane kind of shrugging his shoulders in disgust at these damn crows that seem to be everywhere. This was captured with the 5D and a 600mm F4 lens.
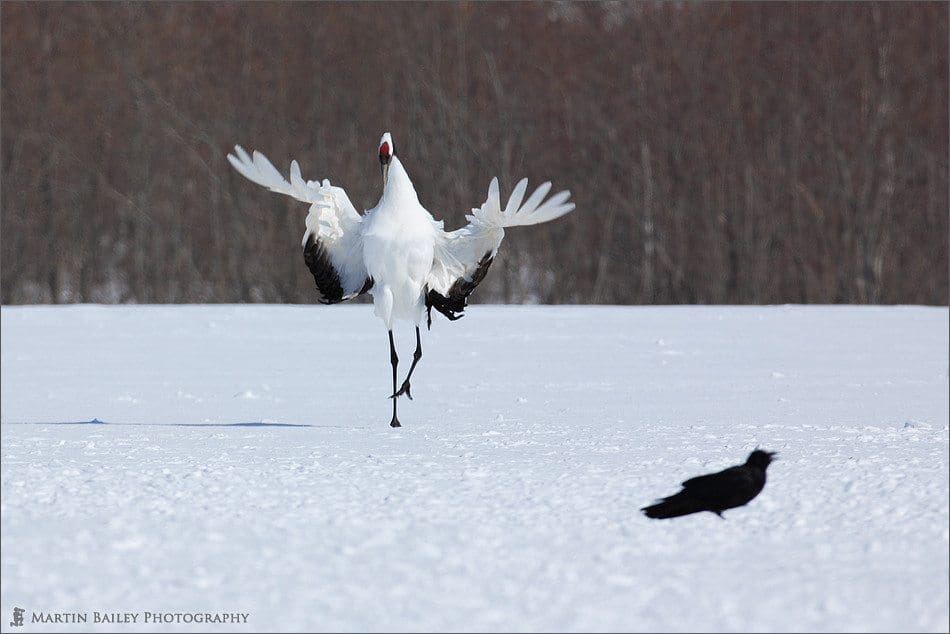
Japanese Cranes 2006 #28 – Jees’ These Crows Are Everywhere!
On the other hand, I used a much shorter focal length of 130mm, which on the 20D with the 1.6X crop factor equates to just over 200mm to capture image number 850, as these five cranes flew in overhead. Both shots would just not have been possible with just the one body. One of the other things was the importance of getting used to shooting in manual mode for subjects like this that can move between a very bright, to a very dark background a lot, as aperture or shutter priority modes will be fooled to set the wrong exposure otherwise. I mentioned this in detail in episode 10 and also in episode 50 in the summary of the same, so I won’t cover it again today.
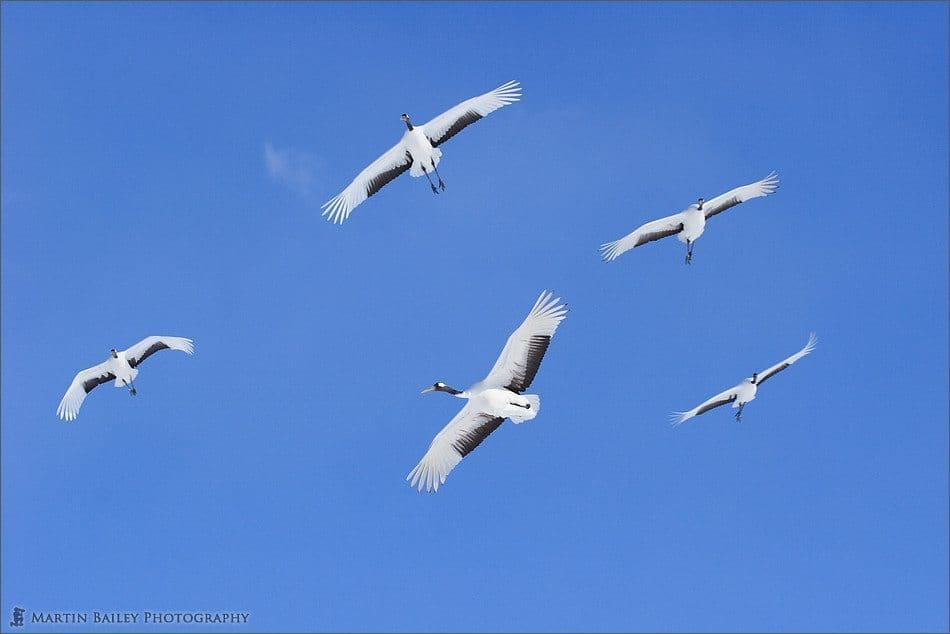
Japanese Cranes 2006 #15
In the following episode we looked at some eagle shots, again made with the 600mm F4 lens. My favourite from this episode is probably image number 874 of a White-Tailed eagle being regarded by a number of Japanese Red-Crowned cranes as it passes between them. One of the things I was getting at here is basically the importance of trying to capture something different. It is easy to concentrate on either the eagle or the cranes here, but getting them both in the same shot, kind of with the beautiful cranes taking a side part instead of centre stage makes for an interesting photograph. I also discussed the Wimberely Head, which is a tripod head that I use with the 600mm F4 lens, and it enables me to balance the lens so well that I can swing it around with the ease of hand-holding, which is very important for a lens of this size and weight. I also use the AI Servo focusing mode at times like this too, as these birds move pretty fast, but I also have my 5D setup so that the AF Stop button on the lens switches between One Shot focusing and AI Servo focusing when pressed, which I find invaluable, especially when you can lock the focus to get the main subject off centre, to avoid bulls-eyeing it in the centre of the frame. There were a few more tips on shooting in cold weather too, like taking the small solid fuel burning hand-warmers to keep, not just your hands warm, but your equipment warm. I fleece cover for your camera with a pocket for the hand warmer can increase your battery life quite a lot and help to prevent camera trouble due to the extreme cold.
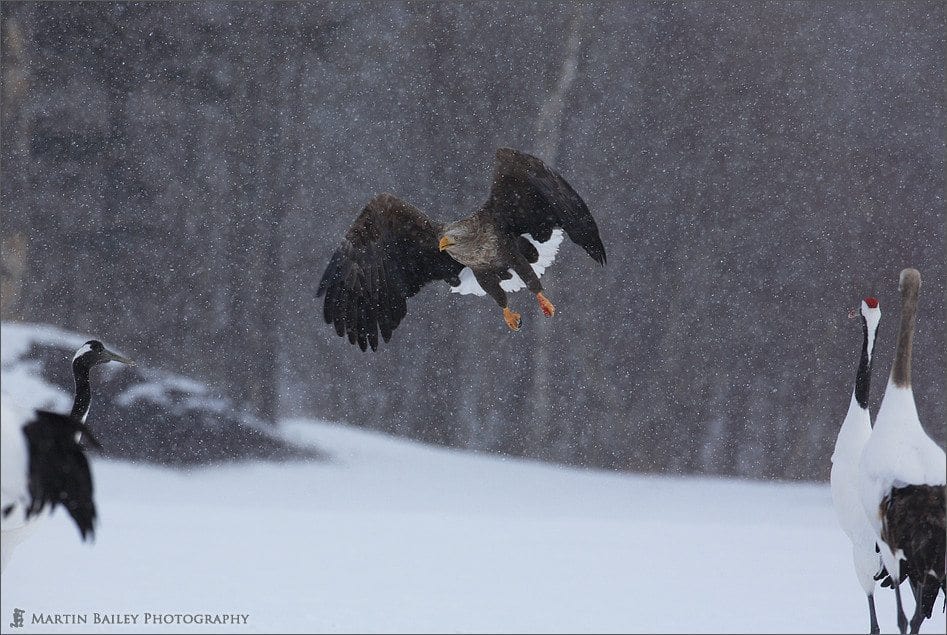
Ruler of the Snow Plains
In the third episode from the series one of the main tips was to rest your monopod on your boot while shooting from a boat with the engine running. I was doing this while shooting image like number 907, of a pair of Steller Eagles quibbling over a scrap of fish, and ending up dropping it, so they both lost out. If you find a boat tour company that are prepared to stop the engines for you, you won’t need to worry about this, but most of the time, they are manoeuvring around quite a lot and so keep the engine running. This causes a lot of vibration that will ruin your images if you don’t dampen it in some way. For this I came up with the idea of putting the monopod leg on my big winter boot. The thing to be careful about here though is that this does make it more difficult to balance. If you are actually sailing at the time, I don’t even recommend standing up, let alone trying to shoot, or you may well end up falling into the icy waters yourself.
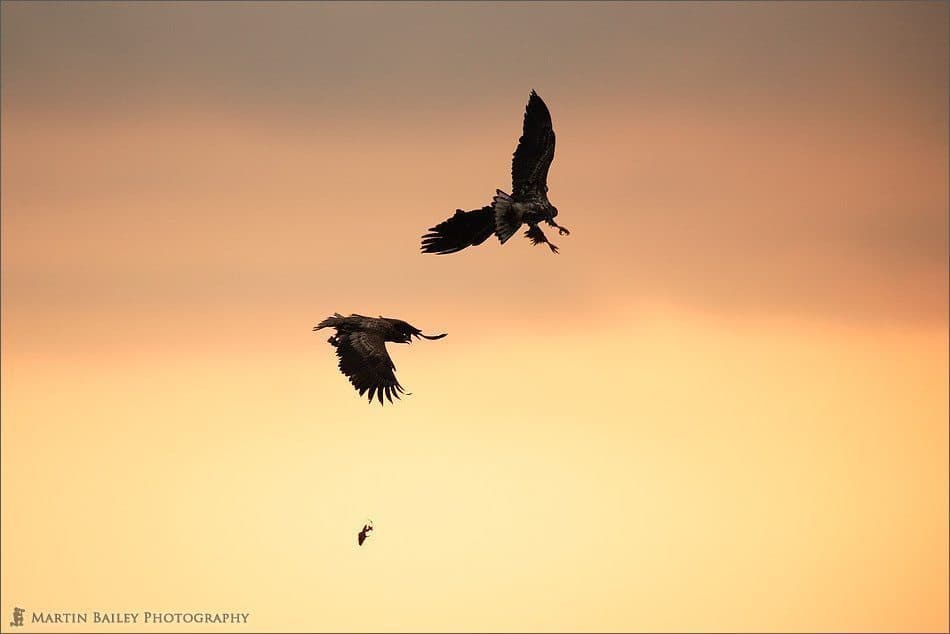
Breakfast Lost
In the very last episode of this series, we looked at some shots of the Hokkaido, or Ezo deer, like the one in shot number 927. There were not really any useful tips in the last episode, more just closing off the series, though I did speak a little about the incredibly harsh conditions in which these deer live, and the problems there growing numbers causes for the trees, as not having enough food to go around in the winter means the deer turn to eating the bark from the tree, leaving them susceptible to the cold and various diseases.
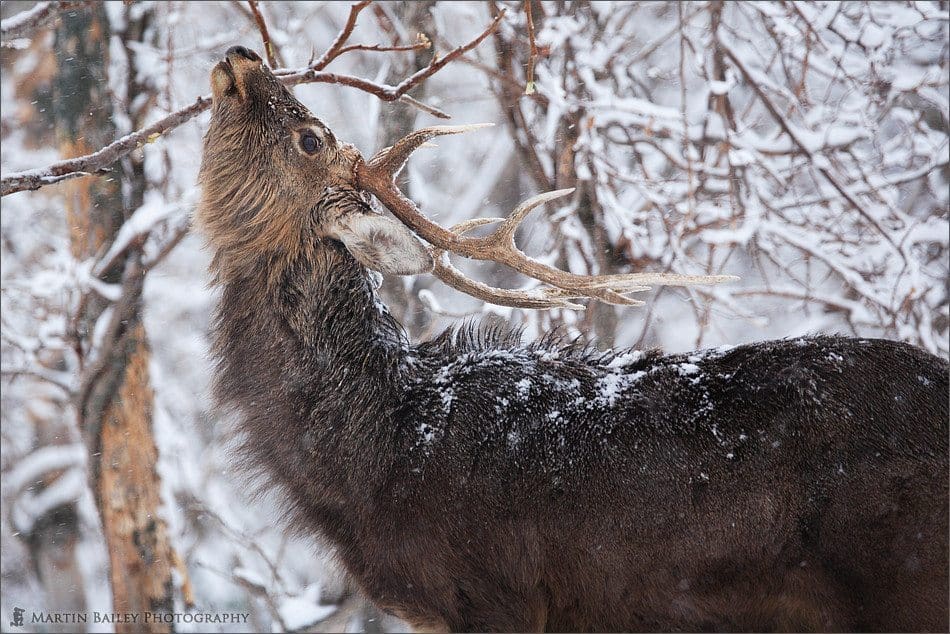
Ezo Deer in His “Element”
In episode 29 when made the jump from the harsh cold of Hokkaido to Spring in Tokyo. In image number 942 we can see the blossom of the Japanese Apricot tree. I’d actually used my 100mm macro lens with a 25mm extension tube. As I mentioned earlier an extension tube allows you to get closer to your subject, filling the screen with them. I love this combination and use it quite a lot. The main tip here was regarding the decision I made was to focus on the right-most petal on the left-hand side flower, as I wanted the line between the two flowers to be as distinct as possible. The obvious choice might have been to focus on the stamen of either the foreground or background flower, but this would have meant that the separation between the two flowers would have been less defined.
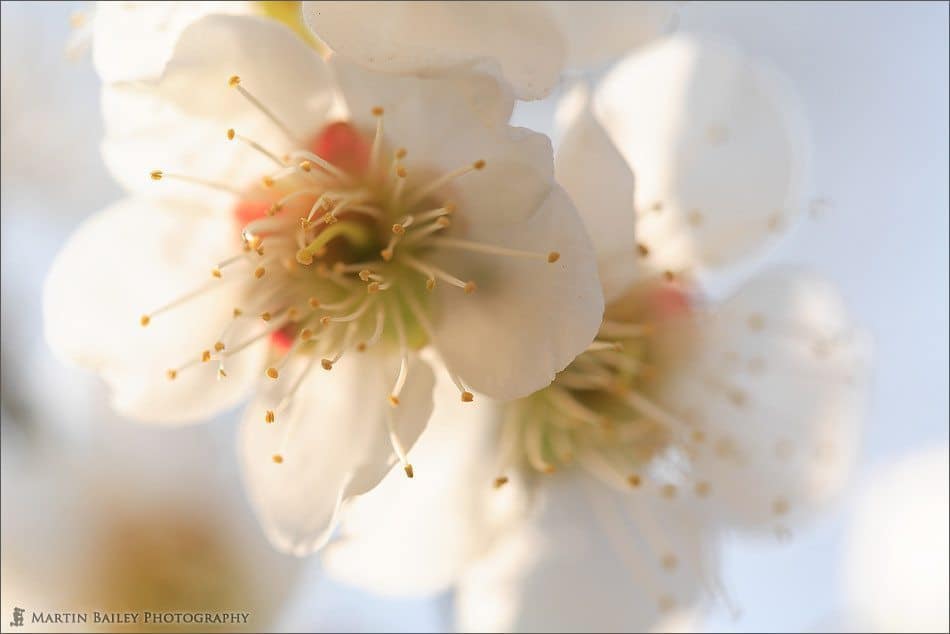
Japanese Apricot Blossom
Episode 30 was pretty much all my impressions from the Photo Imaging Expo 2006, but I did talk a little about my being 100% in agreement with a friend of mine, Yoshiaki Kobayashi, a top nature photographer here in Japan, who’s seminar I was lucky to catch. Kobayashi Sensei said that just because digital photography has made it very easy to correct exposure in post-processing, there is no excuse for not getting it right when you are shooting the original. Honing your photographic technical skills to the point where you can get your exposure accurate in the field will help you to get the best quality images possible. If you shoot shoddily in the field and then crank up the exposure in post processing, even if you use RAW, you’ll add grain to your images, and lower the dynamic range and often contrast too. If you are going to go to the trouble to go out and shoot images, make them the best they can be by learning how to expose them correctly. With the availability of the histogram too now with digital photography, we should be getting better at this, but the fact is many people are getting sloppier and sloppier because they rely too much on post processing.
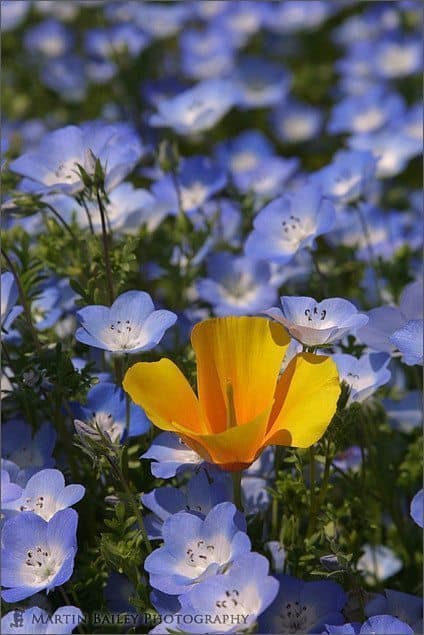
Poppy in Baby Blue Eyes (Nemophila)
OK, so now we’re really getting into the recent memory zone, with episode 31 we kicked off the first photography assignment, with the subject of Contrasting Colours. To illustrate a point I put a Colour Wheel page on my Web site. I’ll put a link to the colour wheel into today’s show notes too, but basically we did an exercise where we opened the colour wheel in one browser window, and then opened image number 56 in another window, placing them on your screen so that both of them are visible. You don’t need to be able to see all of both windows, but you need to at least be able to see the colour of both the orange poppy and the blue Nemophila flowers. Then place your mouse over the colour wheel and move it around until you see an orange, similar to that of the orange poppy. It doesn’t need to be exactly the same as this is just to make a point. If you look at the three vertical rectangles below the colour wheel, you’ll see the colours changing and the numbers in the boxes also changing. Once you get something close to the orange of the poppy, click the colour wheel, and the colour you click will be added to the list of colours on the left of the screen. Then, move your mouse from that point diagonally across the wheel to around the same position on the opposite side and take a look at the colours in the three strips below the wheel now. You can click to add this to the list on the left too, but basically you’ll now see a light blue, similar to the colour of the Baby Blue Eyes or Nemophila flowers. The point here is that colours on opposite sides of the colour wheel that initially appear to be in total contrast, actually compliment each other from a design perspective. This is why the Poppy with Baby Blue Eyes shot is so eye-catching.
In episode 32 I discussed consideration for buying a new tripod. I myself have two tripods, one that is quite small, but big enough to just about reach my eye level without having to bend over. I did say in this episode that I did not have to raise the centre pole on my Manfrotto 444 Carbon One tripod to be able to look through the view finder without bending over at all, but this is actually not the case. I actually do need to raise the centre pole just a few inches to really get it to eye level when standing up straight. What I find myself doing though is rather than raising the centre pole, especially if there’s a breeze, I open my legs wider apart so that my eye level drops without me having to stoop. Stooping down for any length of time is really not good for your back, and so the advice was to get something that you don’t need to stoop to look through the view finder. Another piece of advice was if weight or size is not a consideration, that is, if you will be transporting the tripod around mainly by car, a model like my other tripod which is a Gitzo, that is a good meter or so higher than me even without the centre pole extended, can be very useful. The main benefits I find of having a very high tripod are firstly, when shooting in snow, where the feet of the tripod will sink significantly. I do now have some snow feet for the tripod to stop it sinking, but they don’t always make sense. The other time is at shows where there is a crowd and you can’t get to the front, or don’t want to with a great big telephoto lens to get in everyone’s way. What you can do is stand on steps yourself and extend the tripod very high to shoot over the heads of the crowd. There were lots of other considerations, like making sure you can get the camera to a very low angle too for macro work, but if you are considering buying a tripod right now, I advise you to take a listen. One other thing I guess I should mention, especially for new listeners, is that very often, a thread is started in the Podcast forum at martinbaileyphotography.com, with the title of the Podcast in question. And in that thread, listeners’ will discuss some of the details and often come up with related ideas and different ways of doing similar things to those I mention. If you are catching up with old episodes many of these threads will be full of useful information, so check them out as well as you catch up on the archives.
Over time, there has been a lot of advice on how to keep camera shake down, but there is often room for even more improvement, and in Episode 33 I gave some more advice for reducing camera vibration further. I discussed cable and wireless releases and timer controls, for tripping the shutter without introducing vibration with your finger. I also mentioned using the mirror lock-up feature that most cameras have to lock the mirror up in advance of actually opening the shutter for the exposure, as the movement of the mirror itself can introduce a small amount of vibration. I also discussed the Plamp, from Wimberely, which I believe is short for Plant Clamp. This is a flexible arm that attaches to your tripod leg or center pole and can be extended to hold your subject, a plant for example, still while you photograph it.
In episode 34 I talked about eyes. I have a fair few images of close-ups of animals eyes, and probably my favourites are one of an alligators eye, and the Pink Flamingo’s Stare, that I first showed you way back in Episode 1 a year ago. This is image number 595. There are no real tips or techniques introduced in this episode other than those for shooting close-up with long lenses, but rather I focused on my interest in eyes as the window to the soul.
![The Pink Flamingo's Stare [C]](https://martinbaileyphotography.com/wp-content/uploads/2006/08/Flamingo_7021.jpg)
The Pink Flamingo’s Stare [C]
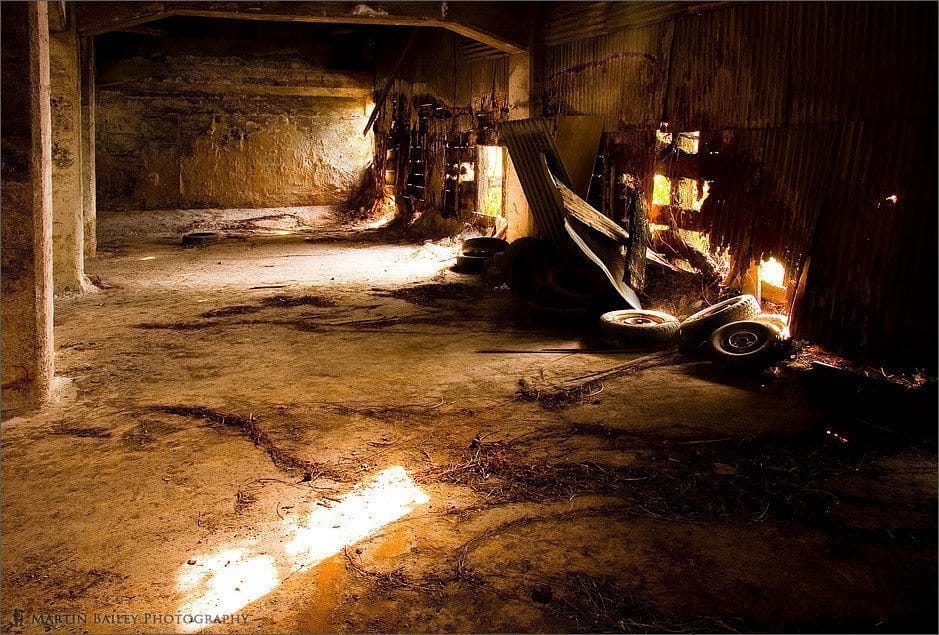
Sunlight Pours In
OK, so there are just 14 episodes left to summarise to get to number 49, the episode before we started the summary, so we’ll definitely finish this series next week. By then, in fact, by the time most of you listen to this Podcast, we’ll be one year old, as I released the first episode on September 1st, 2005. So thanks very much once again to all of you that keep on listening. Without you guys listening, there’d be no point to any of this. Also, thanks to all of you that responded to my calls to spread the word last month, and thanks to the PhotoCast Network as well, as we are definitely seeing a lot of new listeners signing up right now, according to the download stats. If you are new to the Martin Bailey Photography Podcast, Welcome, and I hope you like what we’re doing here, and find it useful, and that you stay subscribed.
Remember that we are still voting for the Depicting Culture assignment until the end of September the 3rd, so if you haven’t voted yet, please go to the mbpgalleries.com Web site and make your selection. Each member only gets one vote, but you can change your selection if you change your mind. You will be asked if this is really want you want to do, and then the system will remove your vote from your old choice and apply it to the new one.
So that’s it for this second episode this week. Enjoy the remainder of the week whatever you do. And once again, thanks very much for listening. Bye bye.
The Martin Bailey Photography Podcast is a member of the Photocast Network. Find other great Photography related Podcasts at photocastnetwork.com.
Subscribe in iTunes for Enhanced Podcasts delivered automatically to your computer.
Download this Podcast in MP3 format (Audio Only).

0 Comments